


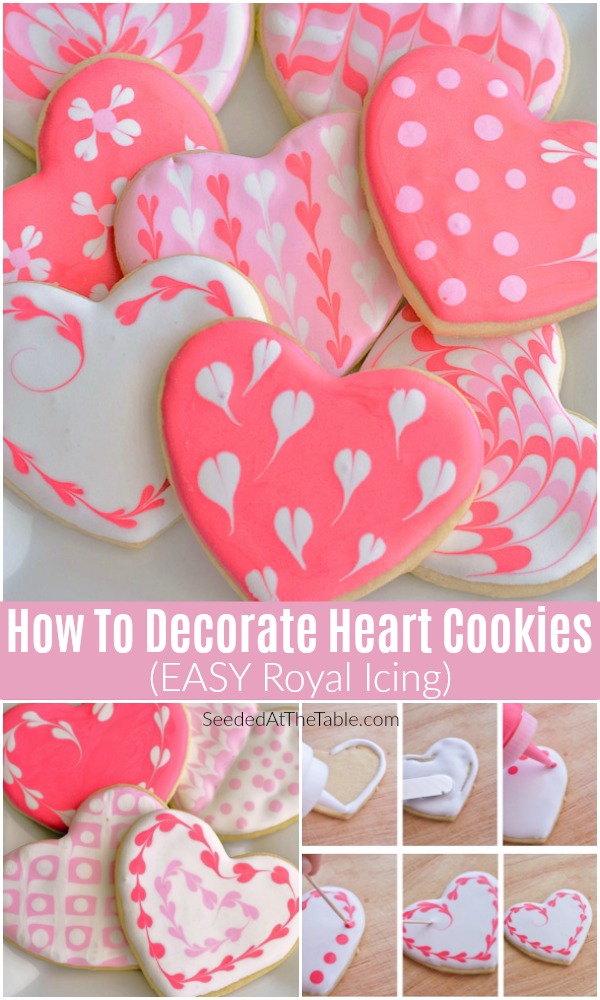
These heart shaped cookies with EASY icing recipe uses toothpicks. You won't believe how simple it is to make beautiful designs with our step by step!
Click here to PIN these Heart Cookies and Icing Recipe!
Valentine's Day is quickly approaching and you might be on the search for a treat to bring to work, school, church, the neighbors, etc. If you're looking to impress, this recipe for Sugar Cookie Hearts with an EASY Royal Icing Recipe is the choice for you!
Looking for more Valentines Day inspiration? Follow me on Instagram!

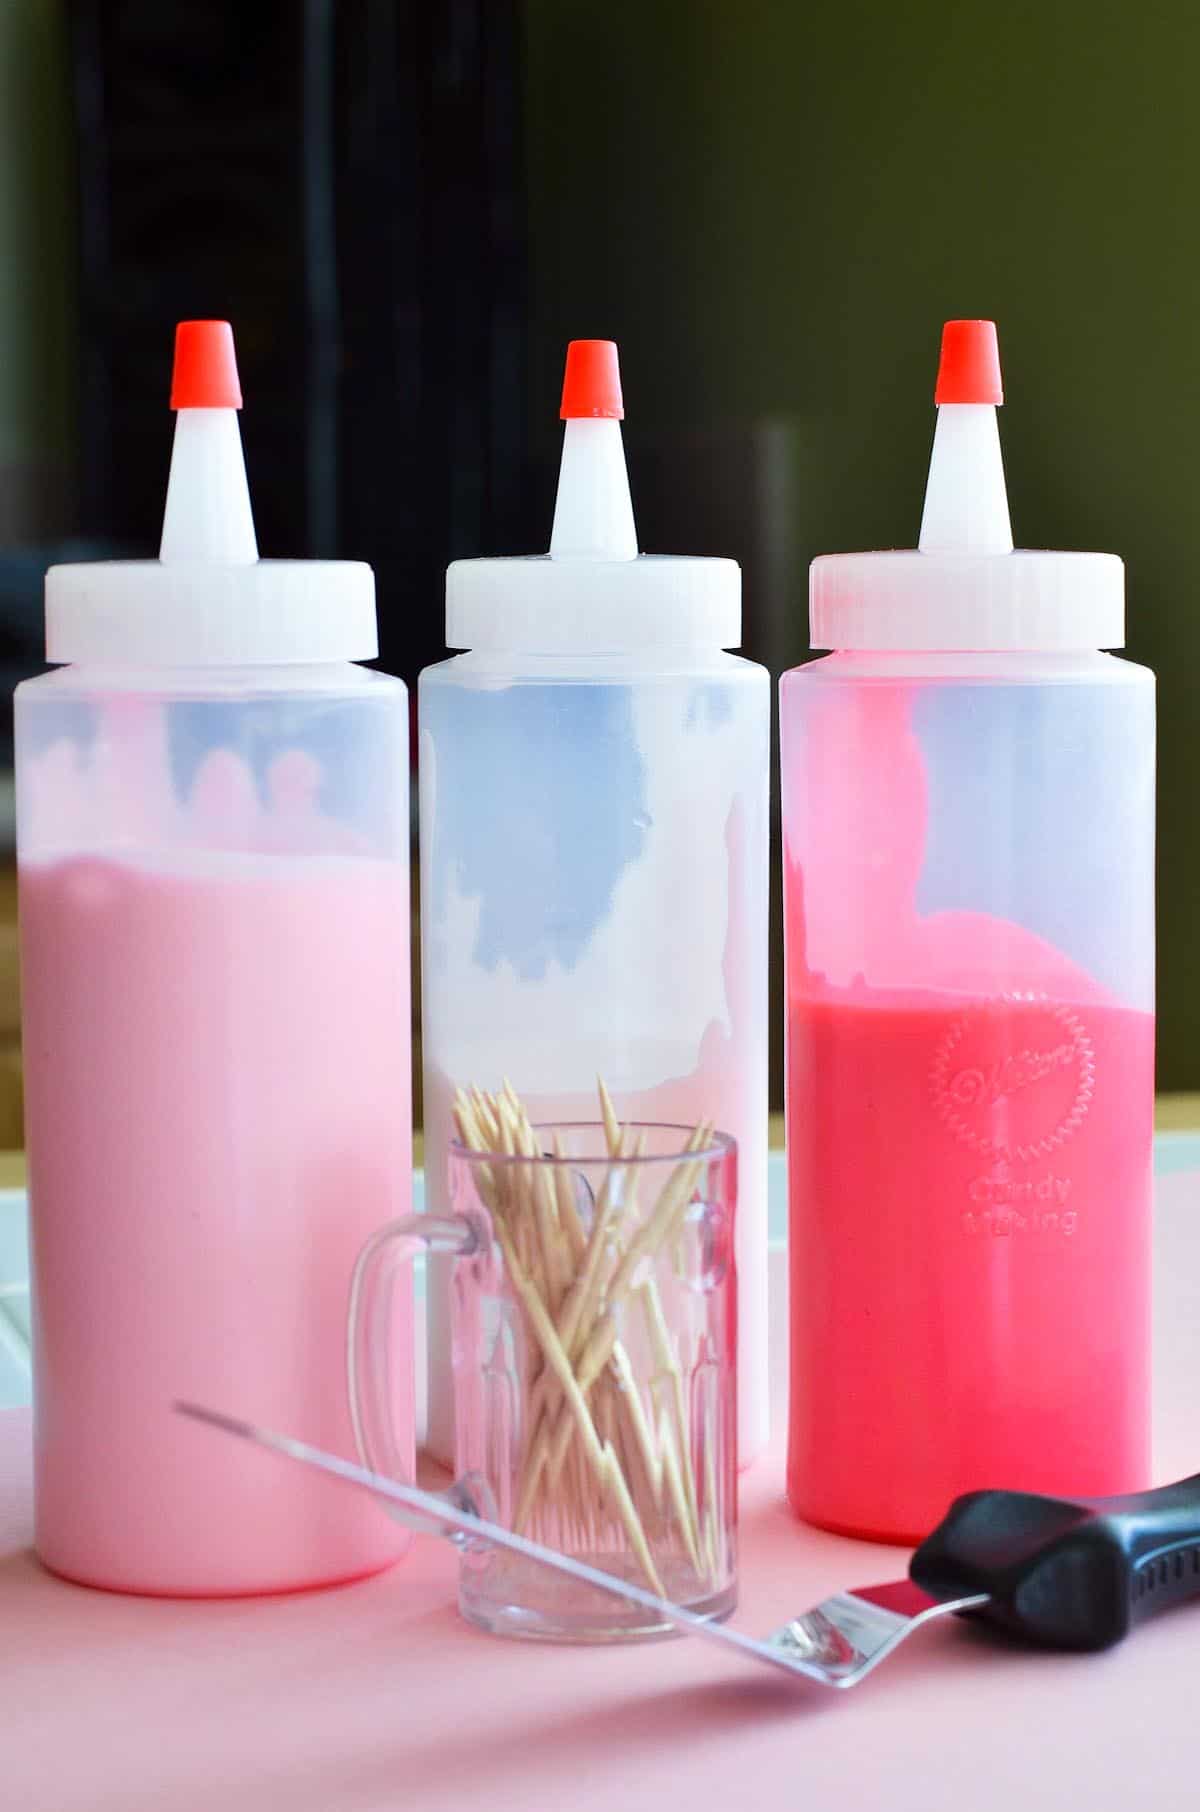
Would you believe me if I told you that these cookies are extremely easy to decorate? It only takes three colors of royal icing (red, white and pink) in three different squeeze bottles and a handful of toothpicks. An off-set spatula to spread the icing is also helpful.
I saw these cute hearts years ago originally on Karen's Cookie blog. She included a nice tutorial on how to make these cookies and to my delight they were so simple and turned out beautifully!
How to Make Marble Hearts with Royal Icing
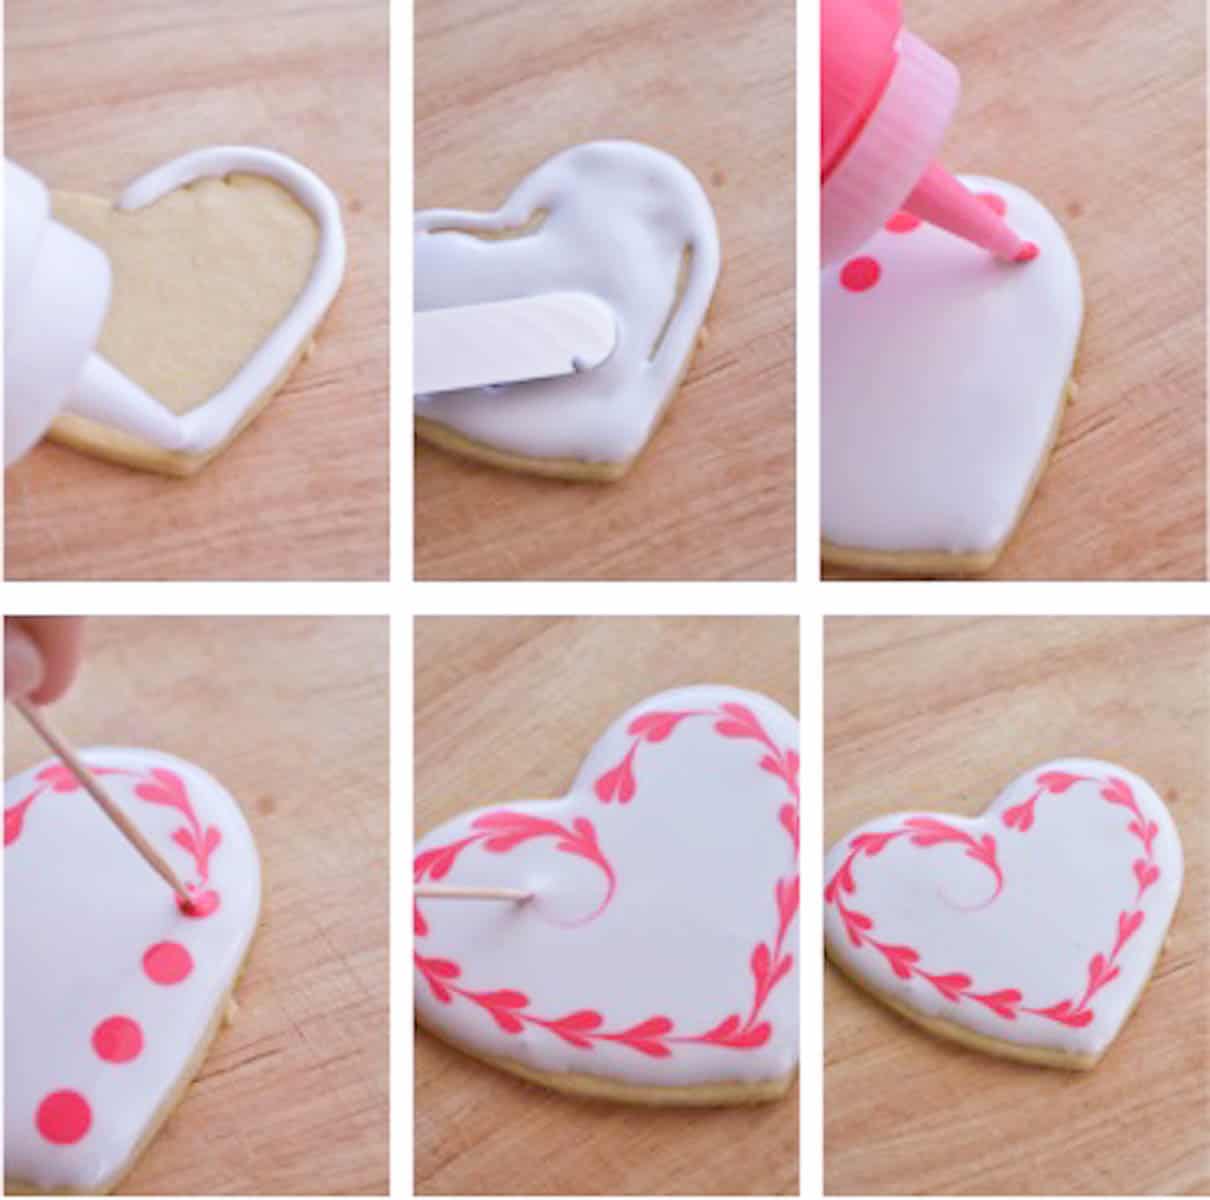
To create the marble hearts, you simply flood the cookie with the royal icing and then quickly dot the background with another color. While it's still wet, run a toothpick through the dots and they magically become hearts! Below is a step-by-step and photo tutorial on how to create the marble hearts on the cookies.
- Flood heart cookies with royal icing.
- Quickly dot the background with another icing color.
- While icing is still wet, run a toothpick through the dots to make the hearts.
- Let set to harden.

How to create tie-dye with royal icing
- Flood heart cookies with royal icing.
- Use two different icing colors to draw lines over the flooded base color.
- While icing is still wet, run a toothpick through the lines either vertically, horizontally, or circular.
- Let set to harden.

Tips for decorating cookies with royal icing
Work with one or two cookies at a time. You want the icing to stay wet and not harden before you can finish decorating. This ensures the different colors will set into each other for flat results.
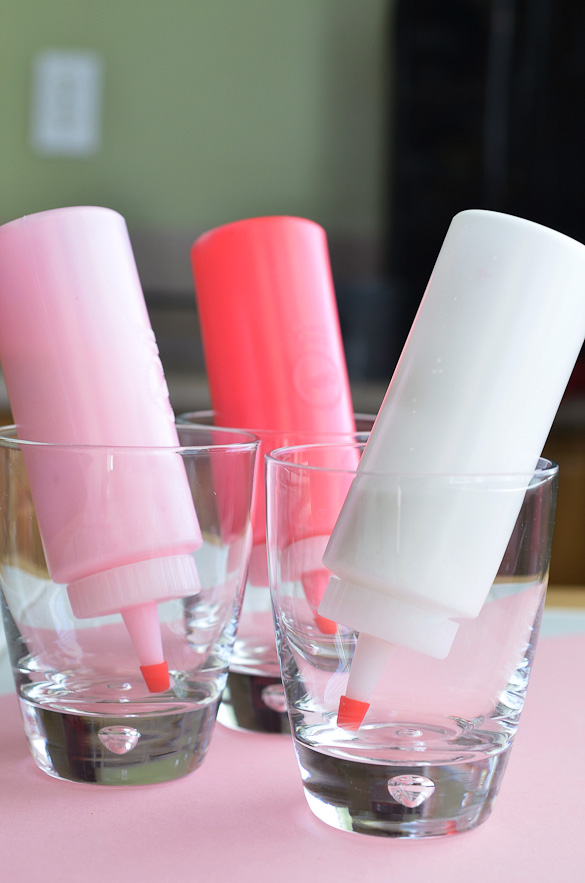
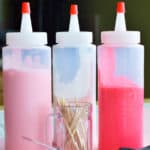
Store squeeze bottles upside down in glasses. It helps to keep the bottles tipped upside down in glasses so they are ready to go. Place a little splash of water in the bottom of each glass so the tips of the bottle don't dry out.
Reuse your toothpicks. Keep paper towels nearby to wipe your toothpick(s) after each use.
Check out Karen's Cookies. For more detailed instructions, visit Karen's Cookie blog.
You will need meringue powder to make royal icing. What is meringue powder and where can you find it? Meringue powder is egg white powder. It is found in most craft and baking stores, like Michael's and Joann Fabrics. I've even found it at Walmart. Or, you can quickly purchase it on Amazon here.

Click here to see how I used a miniature version of these sugar cookie hearts to top my favorite strawberry cupcakes for a Valentine's Day treat!
I am a fan of the royal icing recipe provided by Karen's Cookies AND her sugar cookie recipe we found years ago. You'll be very proud of yourself after making these cookies. And, you'll have a hard time eating them since they're so pretty!
Other Recipes Using Easy Royal Icing
- Monster Sugar Cookies
- Father's Day Sugar Cookies
- Mother's Day Sugar Cookies
- Welcome Home Sugar Cookies
- DIY Homemade Candy Dots
PIN this to save for later. Made this recipe? Leave a star rating and tag me on Instagram @seededtable so I can see. I love hearing from you!
This post for Heart Shaped Cookies and Easy Royal Icing was originally published on February 7, 2011 and updated on February 3rd, 2020 with new recipe tips then again January 2022 with optimized photos. The recipes were not changed during any of these updates.
Recipe Card

Heart Shaped Cookies with Royal Icing
Ingredients
- 1 cup butter , softened
- 1 cup superfine sugar (or granulated sugar processed in food processor for 30 seconds)
- ½ teaspoon salt
- 1 large egg
- 1 large egg yolk
- 2 teaspoons vanilla
- ½ teaspoon almond extract , optional
- 2 ½ cups all-purpose flour
Instructions
- In the bowl of a stand mixer fitted with the paddle attachment, cream together the butter, sugar and salt at medium speed until light and fluffy, about 3 minutes. Add the egg yolk and beat until fully incorporated. Mix in the whole egg, vanilla and optional almond extract. Beat until full mixed. Add the flour, then beat at low speed just until combined. Be careful to not over-mix. Divide the dough in half and wrap in plastic wrap. Store in fridge until firm, at least one hour and up to 2 days.
- Preheat oven to 375°F. On a floured work surface, roll the dough to ¼-inch thick, sprinkling with additional flour as needed to prevent sticking. Use cookies cutters to cut into shapes and place on parchment or silicone-lined pans. Bake until cookies appear dry on the surface and are light golden brown on the edges, about 10 minutes (or a few more for larger cookies). Let sit for 2 minutes before removing from cookie sheets. Allow to cool completely on cooling racks before decorating.
- Decorate with our Easy Royal Icing recipe.
Notes
Nutrition
Recipe Card
EASY Royal Icing Recipe
Ingredients
- 3 tablespoons meringue powder
- 1 lb powdered sugar
- 6 tablespoons water , more or less as needed
- ½ teaspoon vanilla extract
- ¼ teaspoon almond extract , optional
Instructions
- Beat all ingredients together until stiff peaks form (about 10 minutes).
- Pour into squeeze bottles and decorate cookies.
Notes
- Source: Karen’s Cookies
- Nutritional information is an estimate only, based on 12 servings.
Nutrition

